How to Convert Your Recessed (Can) Light and Install a Pendant Light Fixture
Screw in pendant light step by step instructions on how to install a pendant light fixture that weighs 50lb or less from a can light fixture or pot light fixture using The Can Converter model R56.
Materials Needed:
- R56 Recessed Can Light Conversion Kit
- Philips & Slotted Screwdrivers
- Wire Cutters
- Safety Goggles
- Marker (pen)
- Power Drill
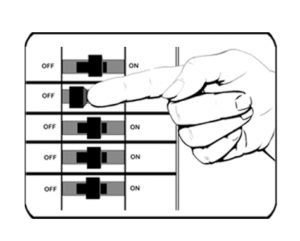
Note: Turn off the power at the breaker box before you start!
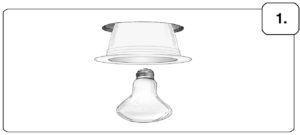
Step 1 Remove the light bulb and can trim from the can light you will be replacing.
Step 2 Put the mounting bracket assembly together using the three offset-sliding-brackets and the three flat-head screws and wing nuts.
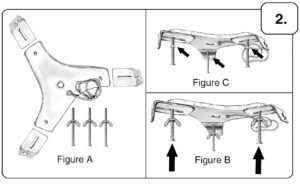
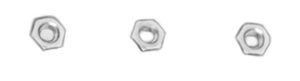
If your can light housing is too narrow, use the three #10 nuts in place of the wing nuts.
Step 3 Within the can housing, there is a metal bracket that holds the light socket. If it is adjustable, loosen the wing nut and slide the bracket to the top of the can housing. Tighten the wing nut and screw in the CAN CONVERTER power outlet adapter.
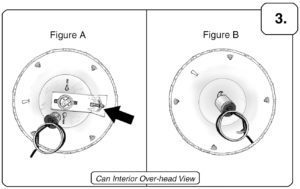
If the socket is NOT adjustable, remove the socket from the trim and screw the CAN CONVERTER power outlet adapter into the socket.
Step 4 If the screws that attached the metal can to the wall are not in a triangular configuration, remove one of the screws.
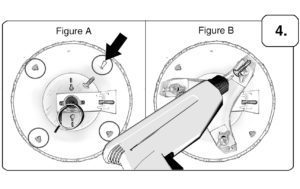
Set the assembled mounting bracket in position to use the empty screw hole. Using a CAN CONVERTER self-tapping screw, attach one of the offset sliding brackets to the can housing.
Step 5 Loosen the wing nuts and slide the two unattached offset sliding brackets so they make contact with the inside wall of the can housing.
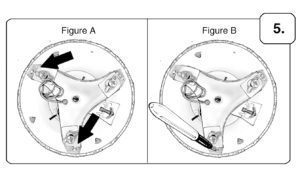
Mark the positions of the two empty offset bracket holes on the can housing.
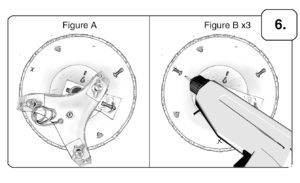
Step 6 Loosen the self-tapping screw and remove the mounting bracket.
Using the power drill, screw the self-tapping screws into the marks you made. Half the length of the screw should remain exposed.
Step 7 Re-inert the mounting bracket assembly and position the offset sliders onto the three self-tapping screws and lower the sliders onto the lock position.
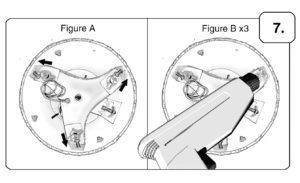
Tighten the screws securely into the can housing.
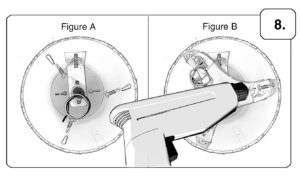
Step 8 If the screws in your existing can ARE in a triangular configuration remove them and replace them with the CAN CONVERTER self-tapping screws. Half the length of the screws should remain exposed.
Using the existing holes to mount the offset-bracket assembly. Set the off-set sliders onto the three self-tapping screws and lower the sliders onto the lock position.
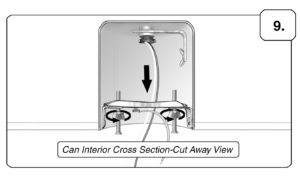
Step 9 Loosen the wing nuts on the flat-head screws and adjust them so that they heads are level with the base of the can. Tighten the wing nuts to lock the screws in position.
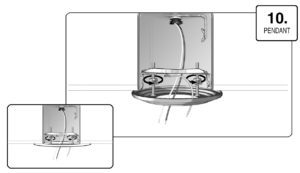
Step 10 Loosen the wing nuts on the flat head screws. Place the medallion you will be using against the ceiling and adjust the length of the screws so that the heads rest about 1/16th inch inside the back of the medallion. Then tighten the wing nuts.
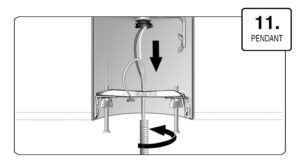
Step 11 Run the wirers from the power outlet adapter and ground wire down through the hole in the mounting bracket. Run the wires through the threaded pipe then screw the pipe into the mounting bracket.
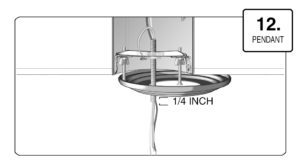
Step 12 Place your medallion at the can light opening against the threaded pipe. Screw the pipe upward so that it extends beyond the medallion by ¼ inch.
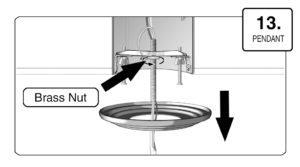
Step 13 Remove the medallion. Screw the brass nut onto the threaded pipe all the way up to the mounting bracket and tighten the brass nut.
Step 14 Match the correct screw holes in the CAN CONVERTER mounting plate with the holes in the next pendant fixture’s canopy. Screw the pendant light fixture’s long screws into the holes in the mounting plate.
Note: The screw heads will be on the inside of the can.
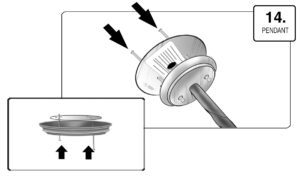
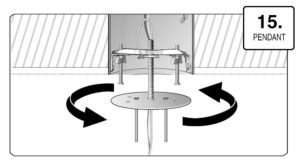
Step 15 Screw the mounting plate onto the threaded pipe so that the plate rests against the heads of the screws on the mounting bracket.
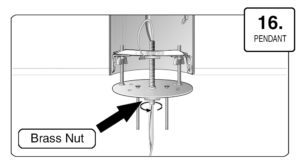
Step 16 Thread the second nut through the wires. Screw the brass nut up the threaded pipe all the way to the mounting plate. Tighten the brass nut to secure the mounting plate to the threaded pipe.
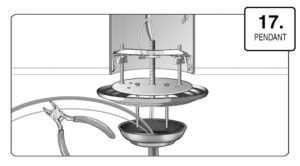
Step 17 Bring your pendant light fixture and medallion to the can light. Cut off any access wiring.
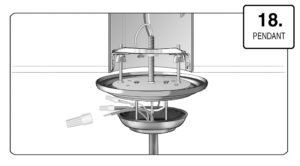
Step 18 Using wire nuts pair together the pendant light fixture’s hot wire to the power outlet adapter’s hot wire, the fixture’s neutral wire to the power outlet adapter’s neutral wire and the pendant light fixture’s ground wire to the power outlet adapter’s neutral wire. Tuck all of the wiring into the pendant light fixture’s canopy.
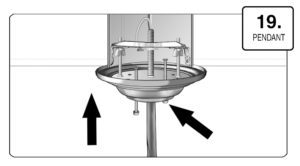
Step 19 Raise the medallion, the light canopy and the pendant light fixture to the ceiling. Secure the canopy by attaching the pendant’s decorative nuts to the extended screws. Alternately drive the nut to the fully tightened position. The screws will back drive then stop when they are tightly in place.
Once all the steps are completed, you can turn the power back on at the breaker box, and installation is complete.
For more information on how to install a pendant light visit us at model R56 can light conversion kit.
Email sales@thecanconverter.com or call us with any questions 1-866-409-9634
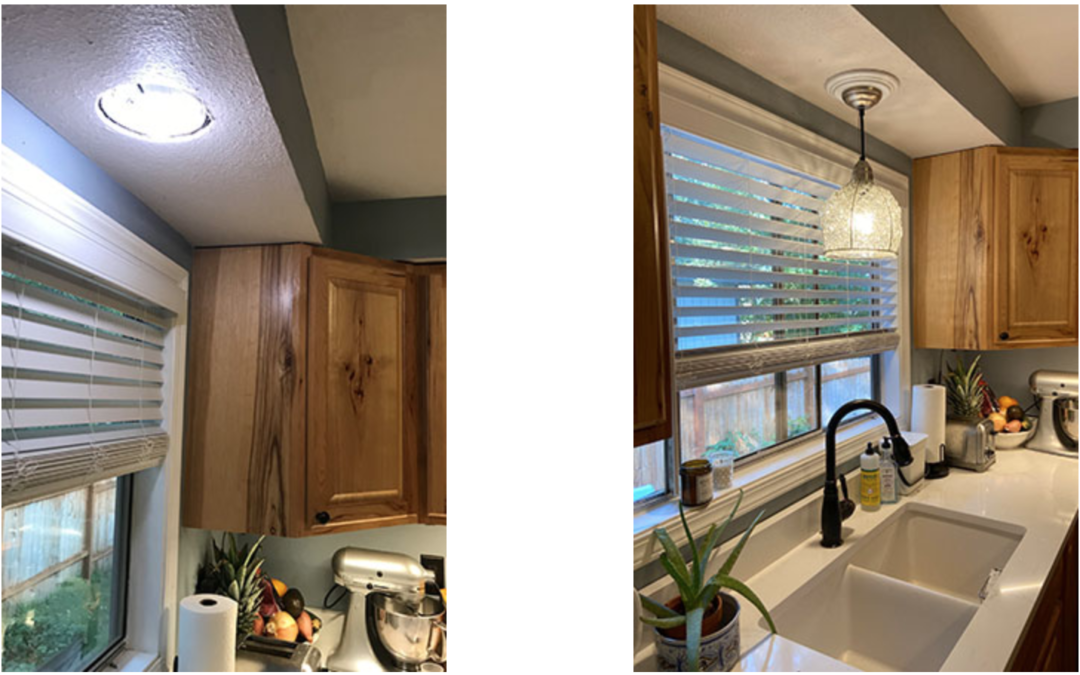
As well as view some of the latest DIY can light conversion’s before and after photos.